Hello, fellow beer enthusiasts! Today, we’re going to tackle a cool DIY project that will significantly elevate your home brewing experience: building a kegerator.
A kegerator is a refrigerator specifically designed to store and dispense kegs. It keeps your beer at the perfect temperature, ensuring that your brew remains fresh and tasty for an extended period. Building your own kegerator can be a fun and rewarding project, and it’s easier than you might think.
So, let’s roll up our sleeves and get started!
What You’ll Need
Before we dive in, let’s make sure we have all the necessary components. Here’s your shopping list:
- An old fridge or freezer (chest or upright).
- A keg (the size depends on the fridge/freezer you’re using).
- A CO2 tank and regulator.
- A keg coupler that fits your keg type.
- Beer and air lines.
- A draft beer tower or a shank.
- A faucet.
- A drip tray (optional but recommended).
- Assorted tools: drill, hole saw, screwdriver, wrenches, etc.
Step 1: Choosing the Right Fridge
The first thing you’ll need is an old fridge or freezer. The size and type you choose depend on your needs and the space you have available. A chest freezer can store more kegs, but an upright fridge is often more convenient for everyday use. Make sure your keg(s) will fit inside.
Step 2: Drilling the Holes
Once you have your fridge, it’s time to drill. If you’re using a tower, you’ll need to drill a hole in the top of the fridge or on the door. If you’re using a shank, the hole will be on the door or the side of the fridge.
It’s essential to be careful while drilling to avoid hitting any coolant lines. Use a hole saw to create the hole, starting with a smaller pilot hole.
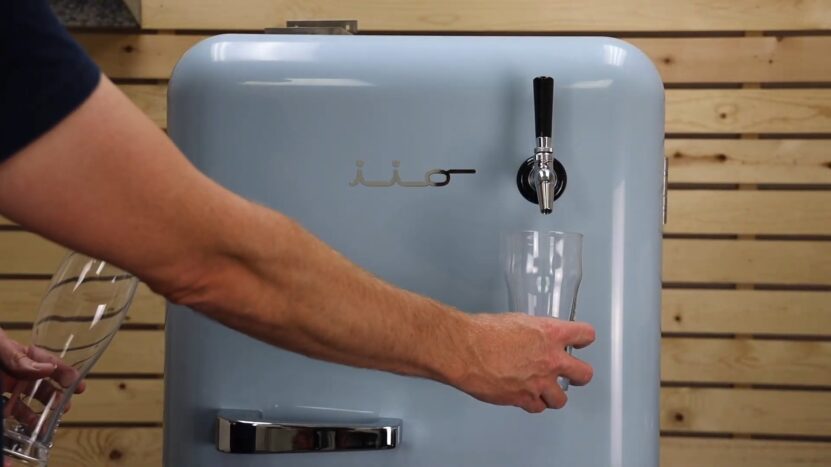
Step 3: Installing the Tower or Shank
After the hole is drilled, you can install your tower or shank. If you’re using a tower, it’s as simple as dropping the beer line down the hole and securing the tower with the provided screws.
If you’re using a shank, you’ll need to feed it through the hole and secure it with the included nut. Then, you can attach the faucet to the outside of the shank and the beer line to the inside.
Step 4: Connecting the Keg
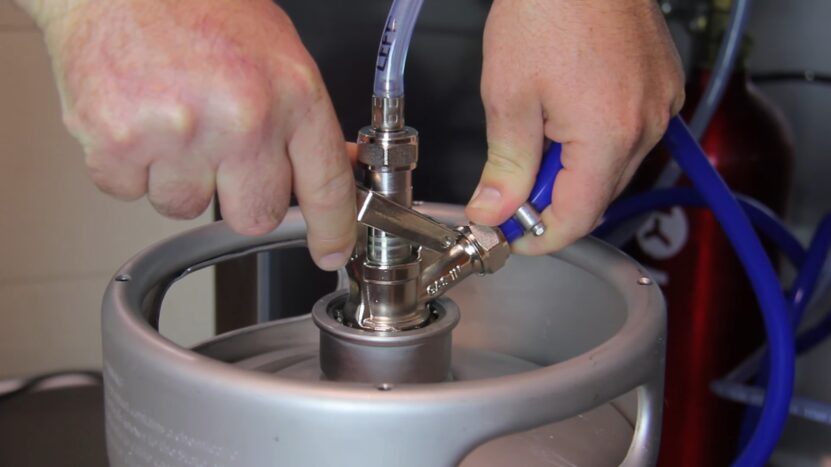
Next, you’ll need to connect your keg. This involves attaching the keg coupler to the keg and connecting the beer and gas lines. The beer line connects to the top of the coupler, while the gas line connects to the side.
Ensure your CO2 tank is securely fastened to avoid any accidents, and remember to open the CO2 tank and adjust the regulator to the correct pressure for your type of beer.
Step 5: Finishing Up
The last step is to tidy up your setup. Secure any loose lines inside the fridge with zip ties, and make sure everything is clean. If you opted for a drip tray, install it now under the faucet.
Congratulations! You now have your very own kegerator.
Tips for Maintaining Your Kegerator
Having successfully built your kegerator, let’s explore some tips to keep it in optimal condition:
- Regular Cleaning: At least once every couple of kegs, clean your kegerator. This includes the faucet, beer line, and keg coupler. Regular cleaning prevents buildup of yeast, bacteria, and mold, ensuring that your beer tastes great every time.
- Check for Leaks: Regularly check your CO2 tank and lines for leaks. A leak can cause you to lose CO2 faster, which could lead to flat beer. You can do this by spraying a mixture of water and dish soap on the lines and connections and looking for bubbles.
- Keep the Temperature Consistent: The temperature of your kegerator is crucial for maintaining the quality of your beer. Most beers are best served between 38°F and 42°F.
- CO2 Pressure: Pay attention to the CO2 pressure. Different beers require different pressures. You can find this information online or from the brewery.
A World of Possibilities
One of the fantastic things about building a DIY kegerator is the potential for customization. There are countless modifications you can make to personalize your kegerator:
- Dual Tap Tower: If you have room for more than one keg, consider installing a dual tap tower. This allows you to serve two types of beer at the same time.
- Temperature Controller: A temperature controller can provide more accurate control over the temperature of your beer. Some even come with smartphone apps so you can monitor and adjust the temperature remotely.
- Custom Handles: The handle on the tap is an excellent place for customization. You can find all sorts of creative handles for sale, or you can make your own.
- Kegerator Wraps: Make your kegerator stand out with a custom wrap. These vinyl wraps adhere to the outside of your fridge or freezer and come in a variety of designs.
Building a DIY kegerator is not just about having a convenient way to serve your favorite beer—it’s also an expression of your personality and passion for brewing.
Advanced Kegerator Options
Once you’ve mastered the basics of kegerator assembly, you might want to explore some advanced options to further enhance your beer-drinking experience. Let’s delve into a few such possibilities:
Nitro Beers
Many beer enthusiasts love the creamy texture and unique mouthfeel of nitro beers. To serve nitro beers from your kegerator, you’ll need a nitrogen tank and a nitrogen regulator, as well as a stout faucet. Nitro beers are usually served at higher pressures than CO2 beers, which contributes to their distinct character.
Keezer Collars
If you used a chest freezer for your kegerator (often called a “keezer“), consider adding a collar. A collar is a wooden frame that you install between the lid and the body of the freezer. This allows you to drill for taps without risking puncturing the freezer’s cooling lines. Plus, it can provide extra height, which might be needed for larger kegs or more elaborate setups.
Digital Pressure Regulators
While traditional dial regulators are great, digital pressure regulators can offer even more precision. These devices give you a digital reading of your current pressure, making it easier to set the perfect level for each type of beer you serve.
Keg Management Solutions
If you plan to run a multi-keg system, implementing a keg management solution can be a game-changer. Some high-tech options on the market can monitor your keg levels, track temperature, and even provide automated cleaning reminders.
Custom Interior
Think about customizing the interior of your kegerator. For example, you could install LED lighting to make it easier to see inside, or you could add custom shelving for storing beer glasses.
The Community Aspect

Don’t forget that home brewing and kegerator DIY is a communal hobby. There are countless forums, social media groups, and clubs dedicated to this craft where enthusiasts share their projects, troubleshoot issues, and exchange tips and tricks. Participating in these communities can provide additional resources and inspiration for your kegerator project.
The Environmental Impact
Lastly, it’s worth mentioning the environmental aspect of building your own kegerator. By repurposing an old fridge or freezer, you’re giving new life to an appliance that might otherwise end up in a landfill. Plus, using kegs instead of individual cans or bottles can significantly reduce packaging waste. It’s a win-win situation—better beer and a better planet!
Final Words
Building a DIY kegerator is a rewarding project that enhances your beer-drinking experience. It allows you to enjoy your favorite brews at their optimal temperature, ensuring that each pint is as refreshing as the last.
Remember, safety should be your priority throughout this DIY project. Always use tools properly and ensure secure connections for all components.
Now, all that’s left to do is to sit back and enjoy your favorite beer straight from your custom kegerator.